Statement Reconcile View
Statement Reconcile View:
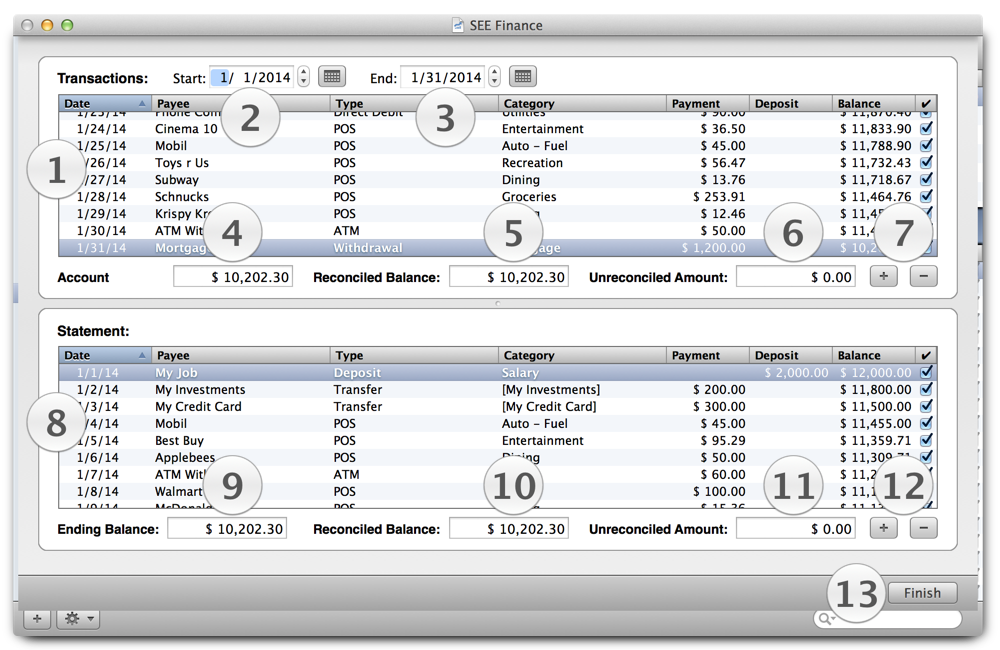
- The "1" marker shows the location of the view where the transactions from the account's transactions register are displayed.
- The "2" marker is the "Start" date picker, which lets you set the starting date for the account's transactions shown in the account transactions table (marker "4").
- The "3" marker is below the "End" date picker, which lets you set the ending date for the account's transactions shown in the account transactions table (marker "4").
- The "4", "5", and "6" markers are just above the location of the account balance, reconciled balanced and unreconciled amount for the account's transactions register.
- The "7" marker is just above the add ("+") and remove ("-") transaction buttons. The add button, when clicked, adds the selected statement transaction in the statement transactions table (marker "8") to the account's transactions register. The remove button, when clicked, removes the selected account transaction in the account's transactions table (marker "1") from the account transactions.
- The "8" marker shows the location of the view where the statement transactions are displayed.
- The "9", "10", and "11" markers are just above the location of the statements ending balance, reconciled balanced and unreconciled amount for the statement.
- The "12" marker is just above the add ("+") and remove ("-") statement transaction buttons. The add button, when clicked, adds the selected transaction in the account's transactions register table (marker "1") to the statement transactions. The remove button, when clicked, removes the selected statement transaction in the statement transactions table (marker "8") from the account transactions.
- The "13" marker shows the location of the "Finish" reconcile button that hides the window once you are finished with your statement reconciliation session.
Notes:
- The transactions tables have optional columns that can be shown or hidden. You can Control click the tables to display the table's contextual menu with selections for setting the optional columns and column sorting.
- Between the upper and lower table is a divider bar that allows you to adjust the height of the tables as desired. The upper transactions table can be fully expanded to take the full area of the window.